Creating professional email accounts for your Domain is essential for maintaining a credible business presence and ensuring secure communication with your clients and customers. This guide will walk you through the simple process of setting up new email accounts directly through your cPanel Hosting control panel. By the end of this article, you’ll be able to create unlimited email addresses using your custom Domain name, set secure passwords, and have your new email account ready to use across all your devices.
Overview
cPanel’s Email Accounts feature allows you to create and manage professional email addresses that use your Domain name (e.g., [email protected], [email protected]). This process typically takes just a few minutes and provides you with full control over your email infrastructure without requiring technical expertise.
Before You Begin
Ensure you have the following information ready:
- Your cPanel login credentials (username and password)
- The desired email username you want to create
- A strong password for the new email account (or you can use cPanel’s built-in password generator)
Step 1: Access Your cPanel Account
Begin by logging into your cPanel account at https://bravo.bhmhosting.com:2083 or https://yourdomainname.com/cPanel (replacing yourdomainname.com with your actual Domain name). Enter your username and password when prompted. Once logged in, you’ll see the main cPanel dashboard with various management tools organized into different sections.
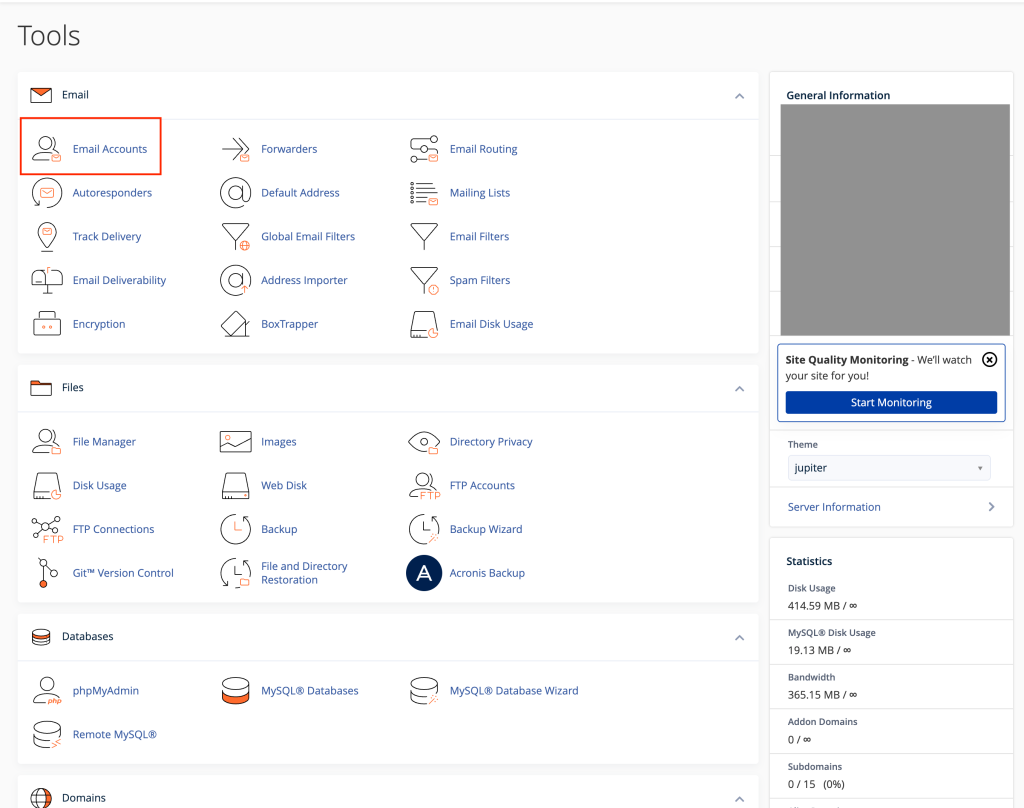
Step 2: Navigate to Email Accounts
Locate the “Email” section on your cPanel dashboard. Within this section, click on “Email Accounts.” This will take you to the email management interface, where you can view existing email accounts and create new ones.
Step 3: Initiate Email Account Creation
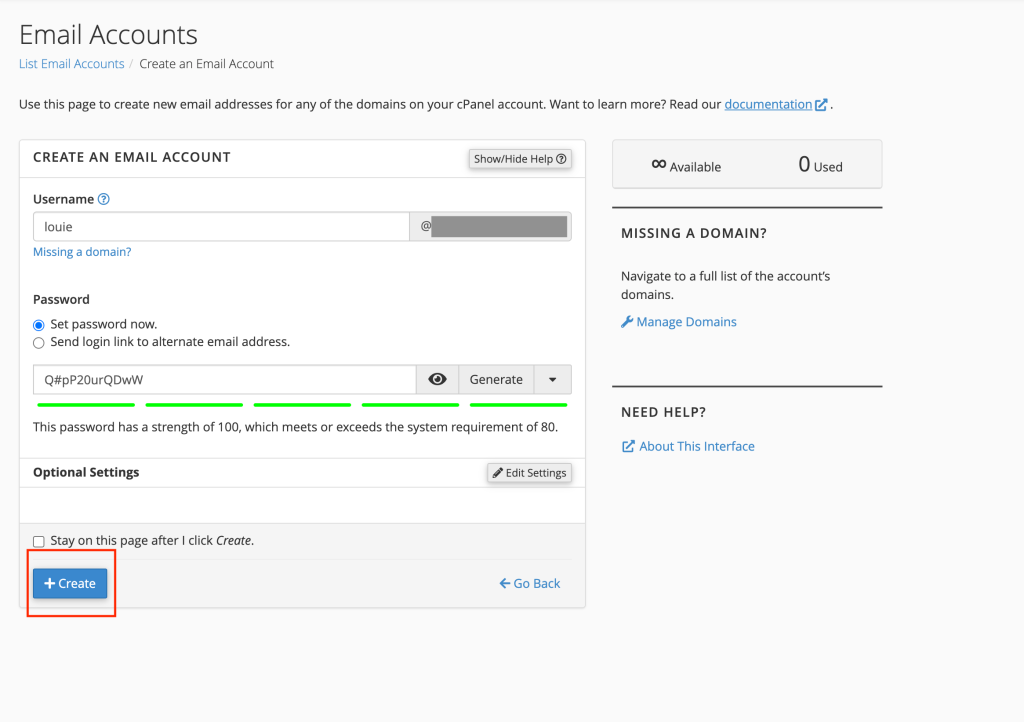
On the Email Accounts page, look for the “[+ Create]” button, which is typically located at the top of the page or in a prominent position. Click this button to begin the process of creating your new email account.

Step 4: Configure Your New Email Account
You’ll now see the email account creation form. Fill in the following details:
Username: Enter your desired email username (the part before the @ symbol). Choose something professional and memorable that reflects the account’s purpose.
Password: Create a strong password for security, or click the password generator tool to create a secure password automatically. The generator will create a complex password that meets security best practices.
Once you’ve entered all the required information and verified that everything looks correct, click the “[+Create]” button to finalize the creation of your new email account.
Confirmation and Next Steps
After successfully creating your email account, cPanel will display a confirmation message. Your new email address is now active and ready to use. You can immediately begin receiving emails at this address, and you can configure it in your preferred email client (such as Outlook, Apple Mail, or Gmail) using the server settings provided in your cPanel.
View our Knowledgebase Articles on loading your new email account on your device HERE.
Important Notes
- Email accounts are created instantly and become active immediately
- You can create multiple email accounts depending on your Hosting plan’s limits
- Remember to store your email passwords securely – Consider setting up email forwarding or autoresponders if needed for business purposes Your new email account is now ready to help you maintain professional communication with your audience while keeping your business correspondence organized and secure.