Overview
This guide will walk you through the process of setting up your BHM email account on your Apple MacOS computer. Having your BHM email properly configured on your MacOS computer allows you to send and receive emails seamlessly, stay connected with your team, and manage your communications efficiently. The setup process takes approximately 5 minutes to complete.
Prerequisites
Before you begin, make sure you have:
– Your BHM email address
– Your email account password
– Incoming & Outgoing Server settings (provided to you)
– A stable internet connection
– Your MacOS computer running the latest operating system version
Accessing Mail Settings
1. Navigate to your Mac Settings
Adding Your BHM Account
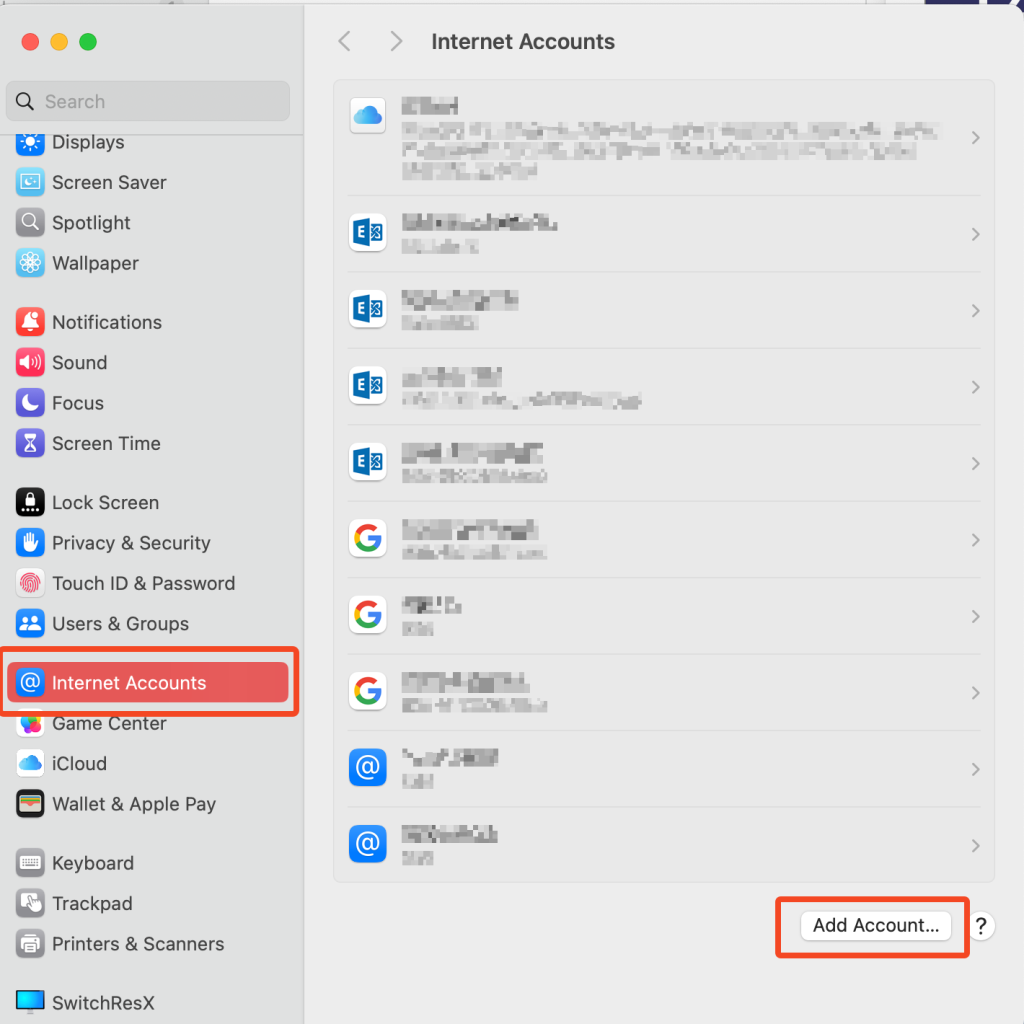
1. Click on “Internet Accounts” and then “Add Account”<
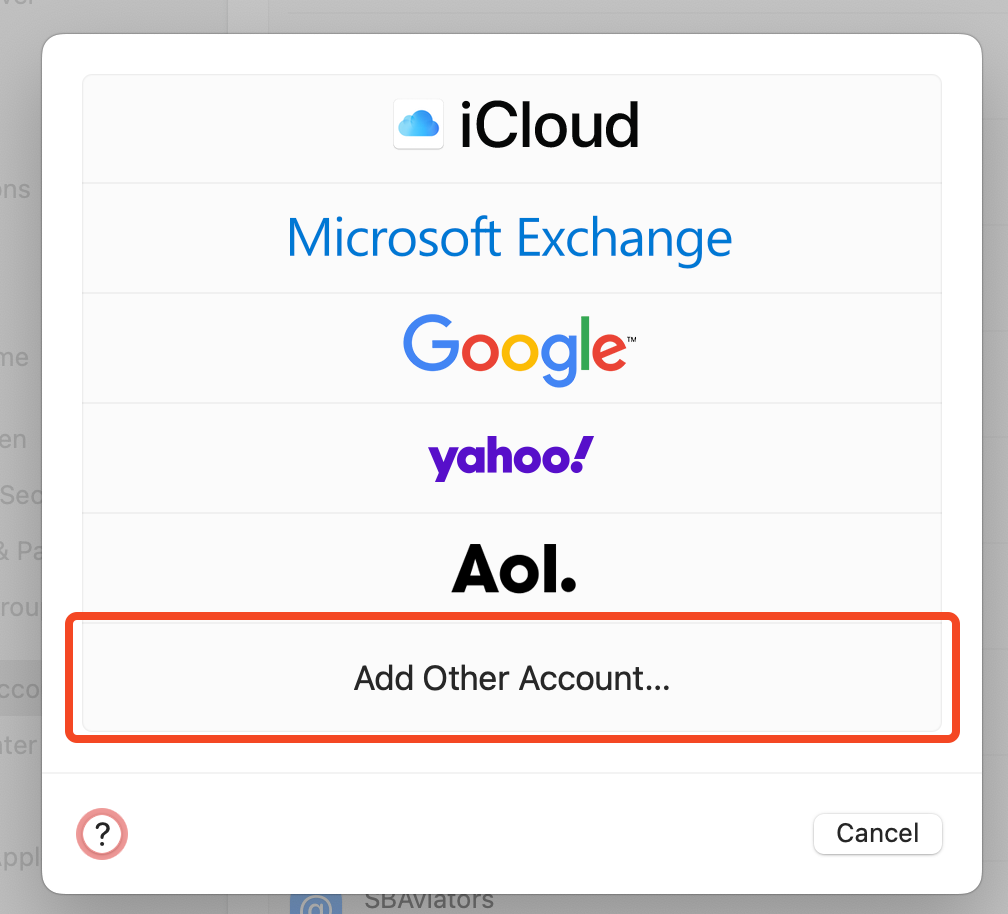
2. Click on “Add Other Account…”
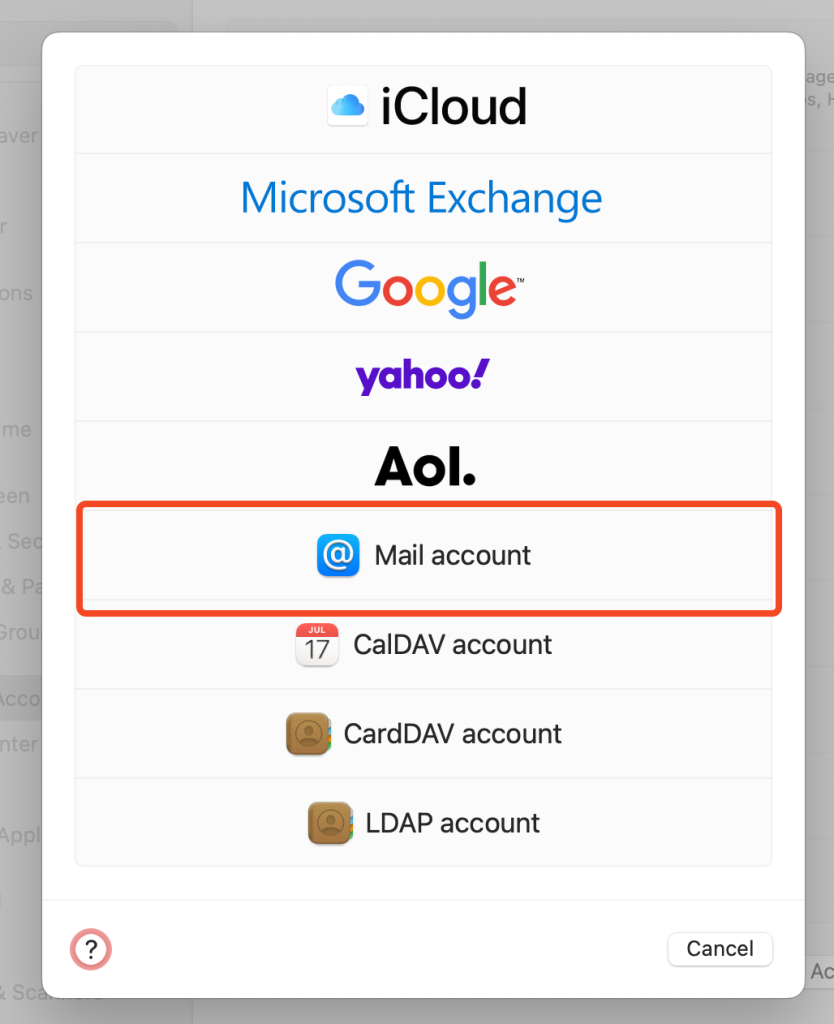
3. Click on “@ Mail Account”
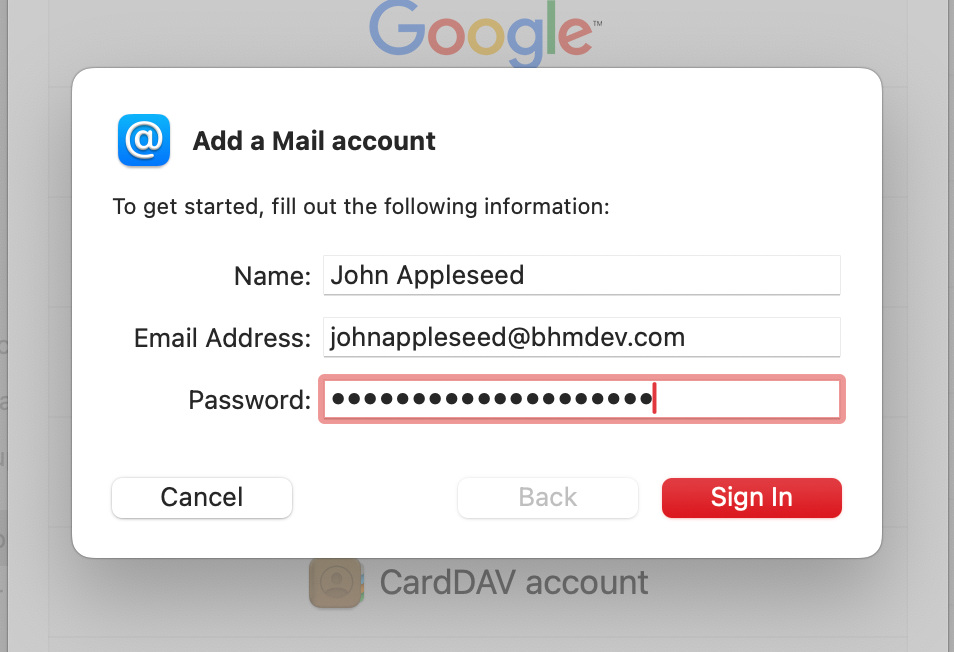
5. Fill in your account details.
– Name: Your full name (as you want it to appear to email recipients)
– Email: Your complete BHM email address
– Password: Your BHM email password (remember, this is case-sensitive)
Configuring Server Settings
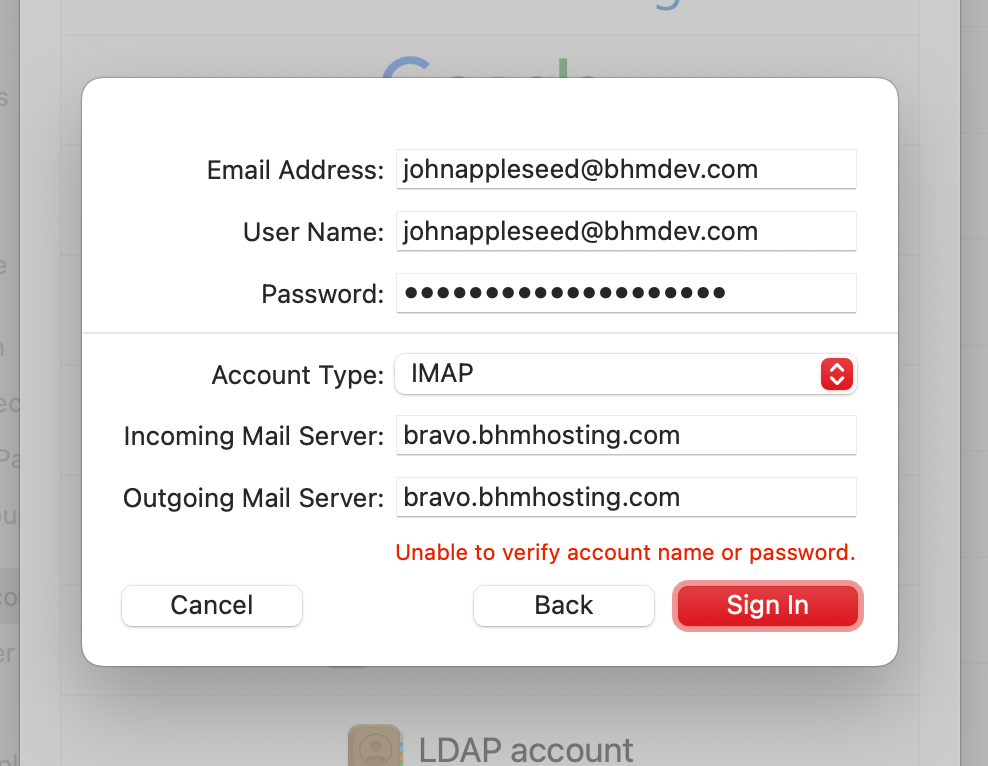
1. Make sure the account type is “IMAP”
2. Enter the following information if it isn’t already filled in:
– Username: Your complete BHM email address
– Password: Your BHM email password (remember, this is case-sensitive)
3. Enter the following information in both the Incoming AND Outgoing Mail Server boxes: mail.yourdomain.com. Making sure to replace yourdomain with your actual Domain name.
4. Click on [Sign In]
Verifying Your Setup
After completing these steps, the setup will verify the connection to our email server. Once verified, you’ll be able to choose which features you want to sync (Mail, Contacts, Calendars, etc.). Select the features you want to use and tap “Save” to finish the setup process.
Troubleshooting
If you encounter any issues during setup:
– Double-check that all server information is entered correctly
– Verify that your password is entered correctly (remember it’s case-sensitive)
– Ensure you have a stable internet connection